
Create New
Create New
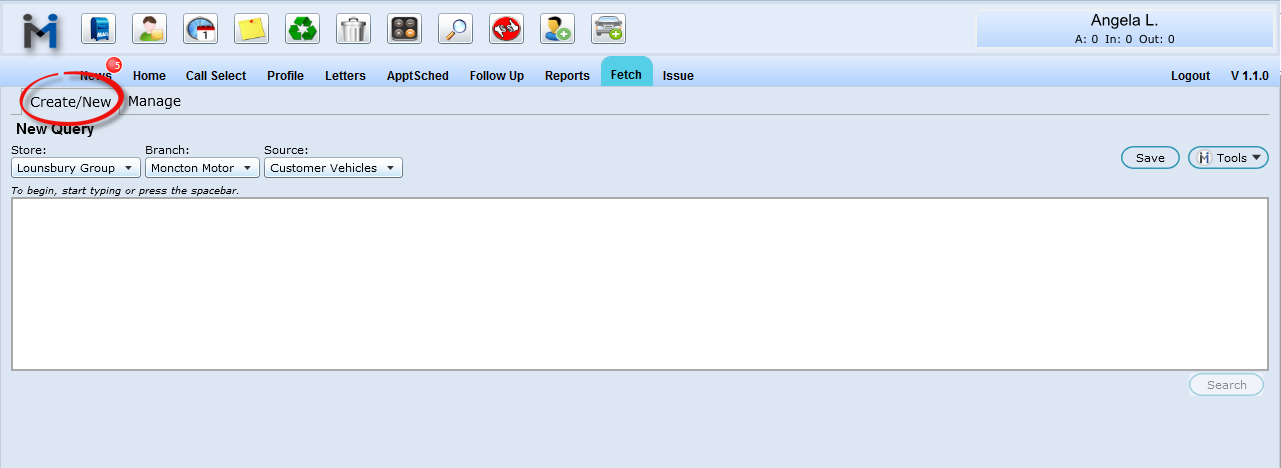
When entering the "Fetch" screen, by default you are in Create/New mode, as shown circled below. Your cursor will be inside the white box, ready for you to enter text or hit the space bar to begin searching for eligible fields.
Entering Fields
To help you complete your query in one easy step a drop down list of fields will appear when you start typing or hit the space bar, such as Last RO Date, RO Count, etc. You must complete your query statement using the options available (<, <=, < >, =, >, >=, LIKE, NOT LIKE) and enter a value.
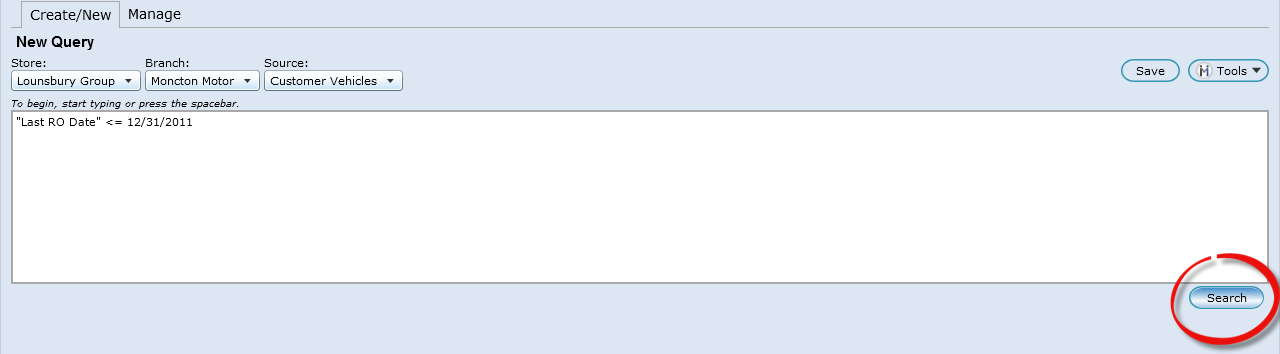
If using a date value, please enter month/day/year format. (12/31/2011)
Understanding the Symbols
Understanding "and / or"
At times it will be necessary to use an "or" rather than "and". For example if you are searching for more than one vehicle model, more than one city, postal code etc. Anytime this occurs as part of your query ensure you are using parentheses to follow the correct order of operations to give you the correct results.
Example:
(Model is like Silverado or Model is like Sierra) and Deal Date <= 01/01/2008 and Deal Date is <=12/31/2012
This statement will complete the operation within the parentheses first, followed by completing the rest of the search, meaning it will find all Silverados or Sierras first that indeed have a Deal Date between the date range specified.
Remember to place parentheses (brackets) around your "or" statement before clicking Search.
Popular Fetch Campaigns
Search
The Search button will be enabled allowing you to search for results if your query statement has been entered properly. Click Search when ready to view results.
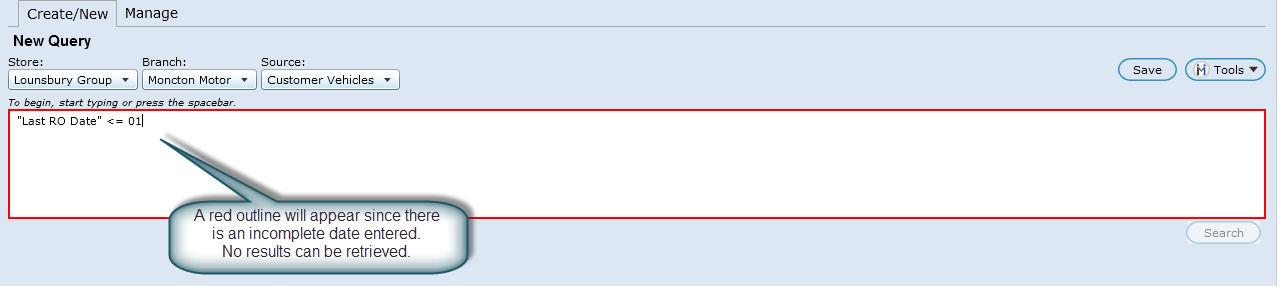
Query Box Outlined in Red
If there is a problem with your query the box will be outlined in red, not allowing you to search for results, which is shown below. You will have to look closely at your query and make necessary changes before being able to search.
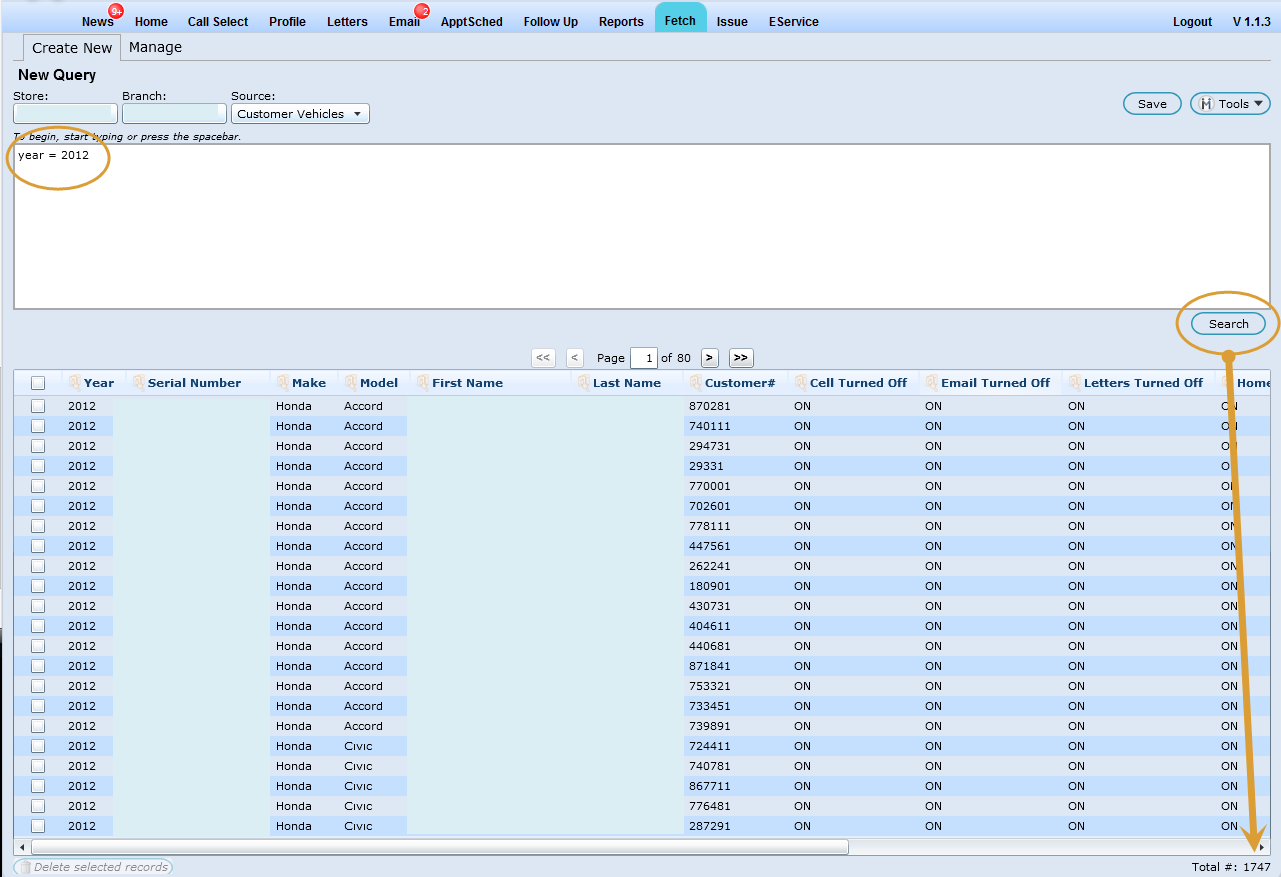
Successful Search
After your search is complete you will see immediate results on your screen. In the bottom right hand corner of your screen you will see how many records were found in your results.
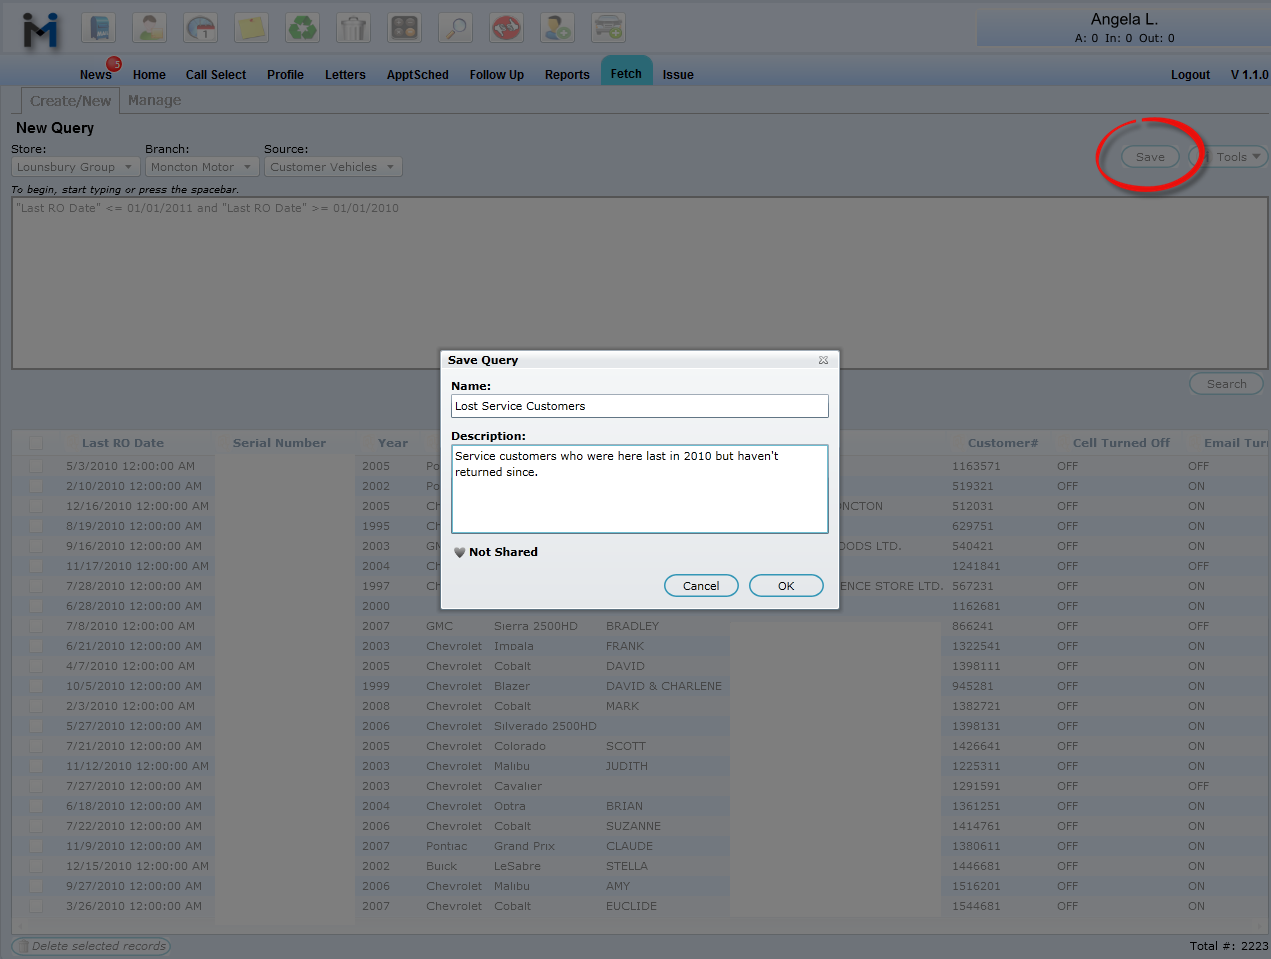
Save
In order to explore any contact options, to use any of the advanced Fetch options,or to view your query results full screen, you must first Save your query.
Click the Save button as shown circled below, name your query and enter a description (optional).
All queries default to Not Shared, meaning they will not be visible to other users.
To Share your query, simply click Not Shared and it will changed to Shared. Click OK to finalize your Save.
Note: Fetch adds columns into queries only when generating a new query; for example, if the user creates a new fetch, it will display all fields queried and configured and then the user saves; if the user edits the queried fetch and removes more fields and then saves again, the default fields (columns) for the original query will not show again. This will give the user the ability to remove columns they don't want to see, save, edit and not see the columns again until they create a new query.
Also we have removed a lot of default fields that the user won't normally want to see for the returned data. The columns that no longer show as default columns are:
Cell Off
Email Off
Letters Off
Home Off
Work Off
Storeno
Branchno
Autofetch Off
Maintenance Off
Language
exclusion inactive does not own
Texting OFF
BirthDate
Vehicletype
NEW - Version 5.5 - Released Sept 3, 2015
We have added a new Fetch Field to the Source Appointment History "Labcharges". When using the Source Appointment History and the field Labcharges, it will return the sum of Labour charges for an ROI.
Version 6.2 – Released June 23, 2016
We have added a new Fetch Field to the Source Customer Vehicles "Axle#". When using this field Axle# it will return all the Axle # information entered in the Query.
*Note the Customer file must have the Axle # information in order to pull into Fetch.
Go to Edit & View Results or Back to Top