
Each store/branch selected allows access to their functionalities for the Dealermine application; i.e. Contacts Selection Screen, Fetch, Reports and Customer Searching and service appointment bookings.
To grant Store Access:
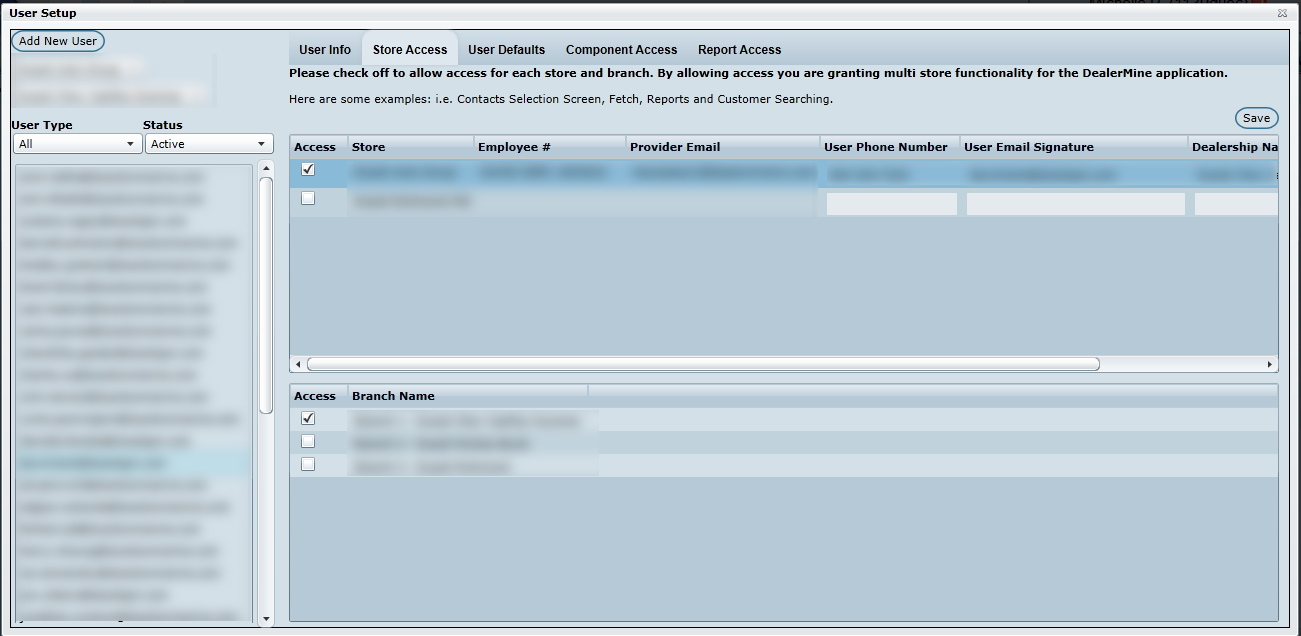
Highlight an employee in the Employee list box and select the Store Access tab.
Check off the stores that the employee requires access to.
If a store has more than one branch, the Admin also has to select the branches the user has access to.
Employee # field is necessary when a User will be booking service appointments for multiple stores.
Select the appropriate Provider Email for the selected store. To do this, select the correlating store/branch Provider Email drop down by placing the cursor in the column. This is useful when the user has access to more than one store or branch. For example, if the user is emailing a customer at a store other than the user's default store, the address the customer sees is the address of their (the customer's) default store.
User Phone Number, Email Signature, Dealership Name and Signature are required for merge fields to populate appropriate information when a user is sending letters and/or emails for multi-stores which differ from the user's default store shown in the User Info tab.
Note: The column Provider Email populates the EmplEmail merge field in Letter templates, and it populates UserEmailAddress merge filed in Email templates. User Email Signature populates the UserEmailSignature merge field for LETTERS only . The user signature information is dependent on the store that the customer's VIN belongs.
Note about email: if an email inbox has been set up for each store or branch and if the user has access to those providers, the customer email response follows these priority rules: store inbox, user's default store, and then the user's inbox.