
In Lender Setup screen an Admin can setup Banks of their choice which will display on the Desking screen. DealerMine will pre-populate the list of Lenders with data we get from Unhaggle, but the Admin can add more lenders for either Lease or Finance along with the Back Code, however if a bank code is not entered then that Lender cannot be made active..
**This menu item will only be visible in Showroom Configuration to Stores/Branches that are turned on for Desking
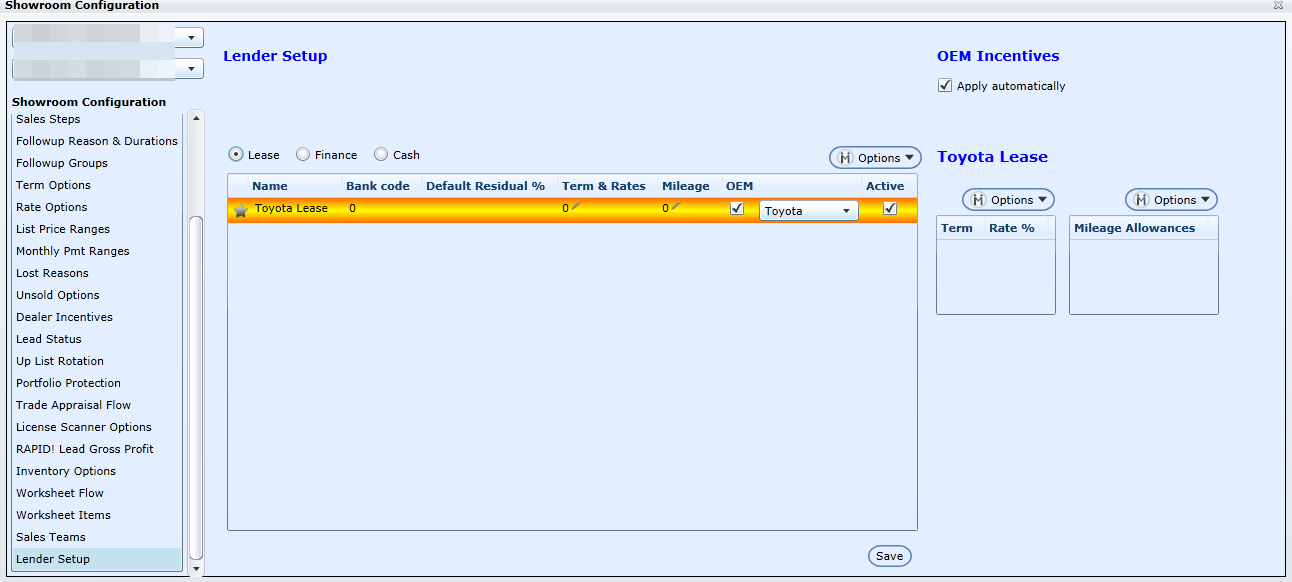
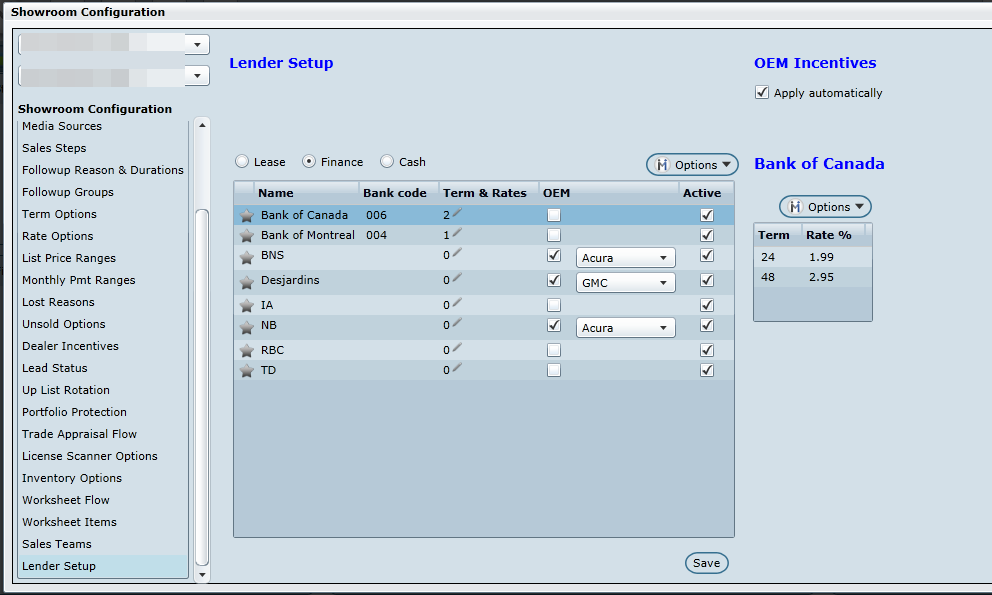
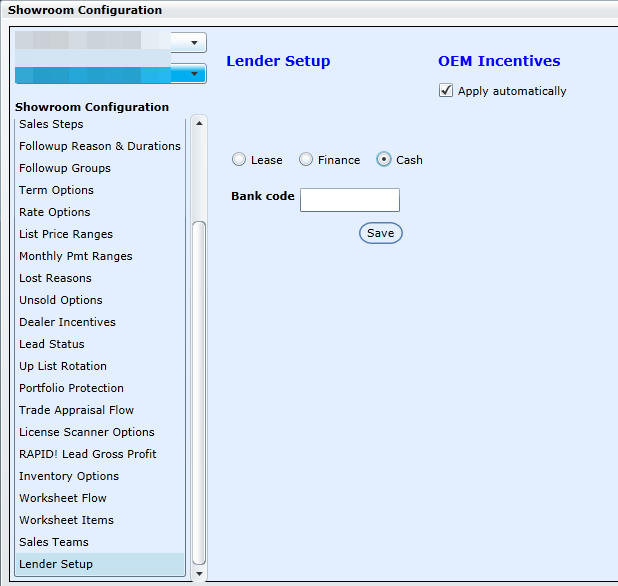
On each grid we will display all Lenders including OEM from Unhaggle, OEM will be the default. A Radio button will display for Lease, Finance which will display the grid for the selected and will display two different grid columns, Cash (no list required). An "OEM Incentives" check box will display at the top of each setup screen "Apply automatically", when checked off the OEM Incentives will automatically be applied to each payment option, when uncheck the user will have to check these options off when in the Worksheet or Desking screen. *This option by default will be checked off.
The grid for Lease will display columns for Name, Bank Code, Default Residual %, Term & Rate, OEM and Active. An Options drop down will display where the use can select “Add New Row”, “Edit Selected Row”, or “Delete Selected Row”, when Add New Row is selected a “Add Lender” popup will display where the user can enter the Name of the lender, a Bank Code and a Default Residual %, Default Residual % will have a hover over displaying "The default residual will only be used if at any point we are not receiving data back from our providers". Once all the changes are Saved the popup closes the new lender will display on the grid. When the pencil is clicked for Term & Rates a popup screen will display where the user can enter a Term and a Rate for the selected Lender. Once the new Term and Rate are entered a number will display by the pencil letting the user know how many have been added, all the Terms and rates will display on a grid to the right of the Lease grid. The options for the Term and Rate grid will only allow a user to Delete Selected Rate. A Term can not be added without a Rate. When clicking the Mileage pencil it will open a Mileage popup where the user is able to add a Mileage Allowance for Lease vehicles only, when saved a number will display by the pencil letting the user know how many are added. The mileage entered will display to the right of the Term & Rate grid "Mileage Allowances". The only options in the drop down is "Delete Selected Mileage". A OEM check box will display on the grid, when checked the user will select from a Make drop down list. An Active check box will display, when check the selected Lender will display on the Desking screen along with the all the information that has been entered and save from this setup screen.
The grid for Finance will display the columns for Name, Bank Code, Term & Rate, OEM and Active. An Options drop down will display where the use can select “Add New Row”, “Edit Selected Row” or “Delete Selected Row”, when Add New Row is selected a “Add Lender” popup will display where the user can enter the Name of the lender and the Bank Code. When Saved the popup closes the new lender will display on the grid. When the Term & Rate pencil is clicked a popup screen will display where the user can enter a Term and a Rate for the Lender. Once the new Term and Rate are entered a number will display by the pencil letting the user know how many have been added, all the Terms and rates will display on a grid to the right of the Finance grid. The options for the Term and Rate grid will only allow a user to Delete Selected Rate, a Term can't be added without a Rate. An OEM check box will display on the grid, when checked the user will select from a Make drop down list. An Active check box will display, when check the selected Lender will display on the Desking screen along with the all the information that has been entered and save from this setup screen.
On the Cash setup screen the Admin can enter the Bank Code and Save.
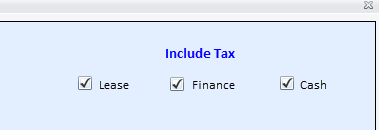
A "Include Tax" option will display in the top right of the Lender Setup screen, with a check box for Lease, Finance and Cash. When one or all of these are checked the tax will automatically be included for that option Lease, Finance or Cash when looking at the Payment options and Price of the vehicle when in the Desking screen.
NEW - Version 6.1 – Released April 14, 2016
New and Used
In Showroom Config > Lender Setup we have add a New and Used option to Finance. From here the user can select what Lenders will be active in the Lender drop downs on the Desking screen for New and for Used. The Admin can select New or Used or both from the Finance grid or when adding a new Lender in the Add Lender popup.