
When an appointment populates the Unconfirmed or Confirmed tab, it requires validation. To validate the customer, click on the customer row.
The Validation screen pops-up.
To validate a customer requires the following steps:
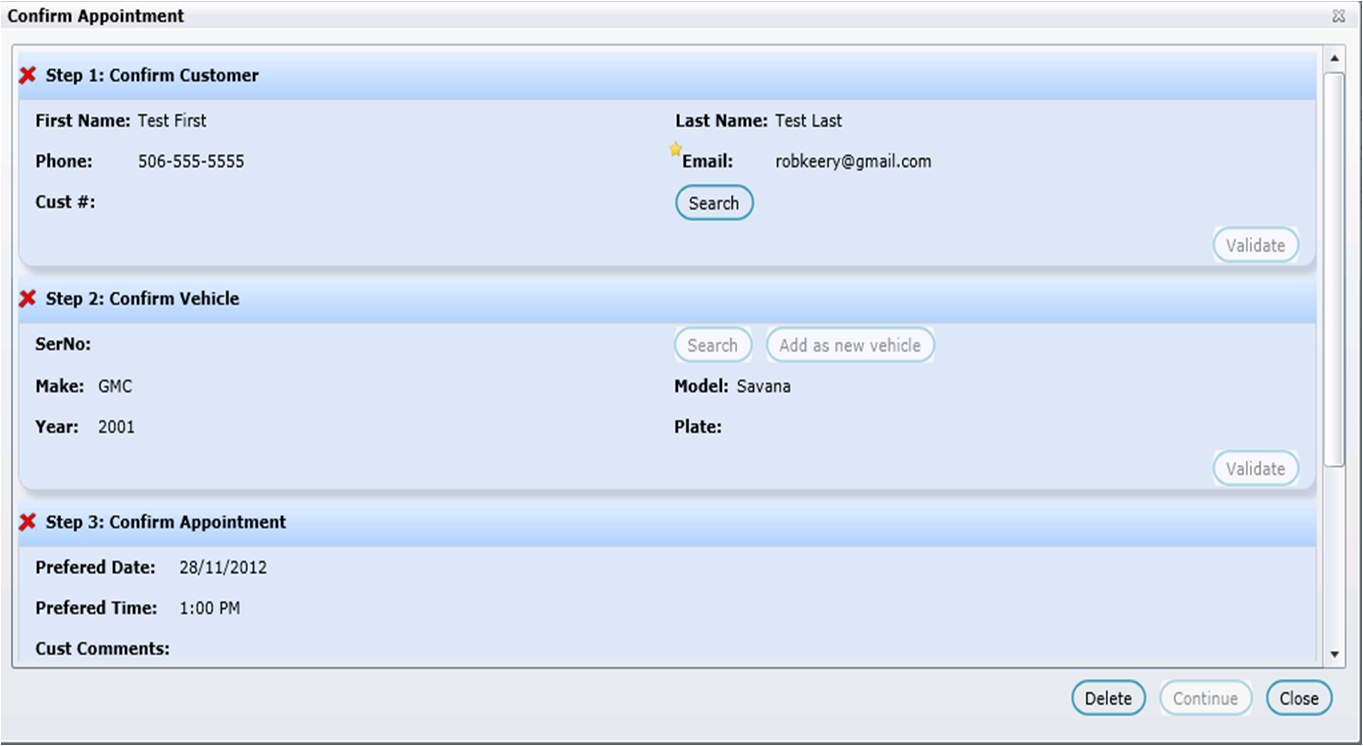
Step 1. Confirm Customer
The Cust # field is blank unless DealerMine found one exact match using last name and email address. Click Unconfirm to choose a different customer if required.
Click Search.
Forwarded to the screen is Customer Search.
If the customer is new:
An error message: Err: No customers found.
Click Okay.
If the customer already exists in the system:
The Customer Information is displayed. Double click on that customer, and the Confirm Appointment screen is presented. Click the Validate button.

If the customer doesn't exist, in the upper right hand corner, click the Add Customer icon: to add the customer.
The Confirm Appointment screen is presented. The Cust # is now populated.
In section Step 1: Confirm Customer , click Validate.
A check mark appears in front of the header: Step 1: Confirm Customer indicating that the customer has been confirmed. To unconfirm, click the Unconfirm link which also appears in the section header.
Step 2. Confirm Vehicle
If the customer is new and the VIN is unknown:
Click Validate.
A check mark appears in front of the header: Step 2: Confirm Vehicle indicating that the vehicle has been confirmed. To unconfirm, click the Unconfirm link which also appears in the section header.
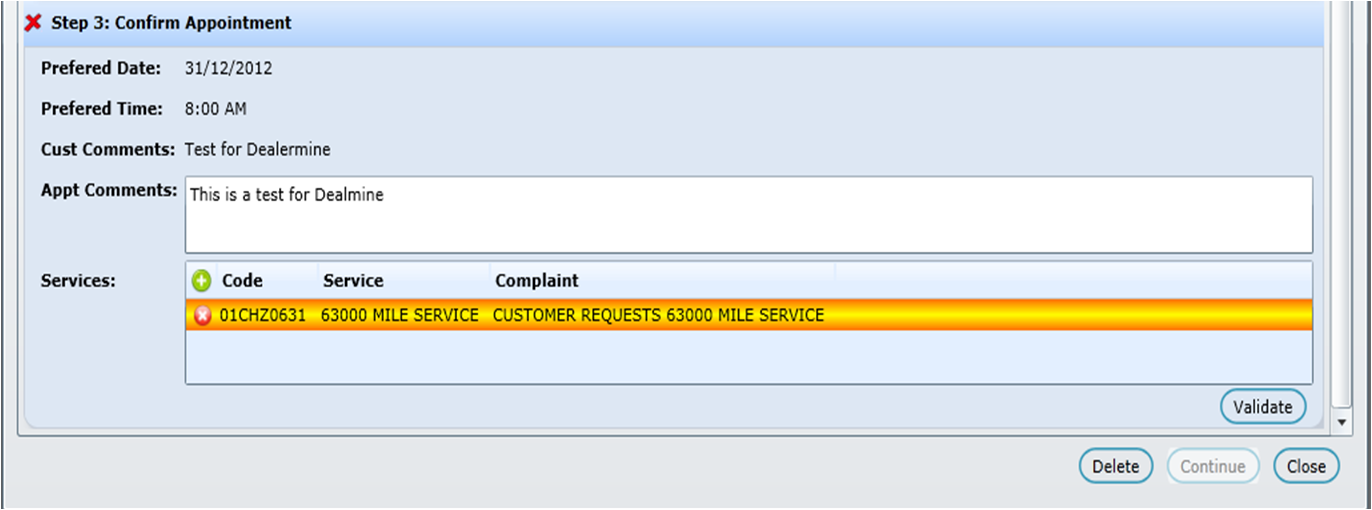
Step 3. Confirm Appointment
Add appointment comments in the Appt Comments: text box.
The services requested by the customer from the eService portal appear in the Services section displaying Code, Service and Complaint. Highlight the items by clicking on the displayed services.
To search the opCode, Click the + sign next to column header Code
Presented on the screen is the Search Services popup
Key the opCode description in the text box, and if the opCode is found, click OK
The Services selection box is populated with the OpCode
Highlight the OpCode, and click Validate-> Continue.
Note for Non-Integrated Stores:
4. You are forwarded to the Customer Profile Screen.
5. In the Vehicle information section, there's now a Draft Appointment icon in front of the VIN that pertains to the appointment being validated.
6. Click the Draft Appointment icon:

7. Forwarded to the the Book Appt window.
8. From here, the appointment can be Booked, Saved as Draft or Deleted.
The appointment information is transferred from the eService online portal and pushed into Dealermine. It populates the eService->Urgent or Unconfirmed tab. An Appointment Coordinator must validate the information from these tabs, then manually book the appointments in the DMS and Recycle the information off the screen in DealerMine. Note: when validating a maintenance, coordinators can copy the opcodes from the maintenances required section and paste the codes into their DMS if required.
Only display a Confirmed Appt if the Appt date is greater than today's date minus 30 days, so the screen only displays the last 30 days of confirmed appt and the upcoming confirmed appt.
Now for customers that use eService, we have added a Store/Branch drop down on the Customer Info screen where the user can select the proper Store/Branch for the customers eService account. This will ensure that the proper Store/Branch is selected each time when adding eservice to a customer's file and when booking appointments.