
The Vehicle Inventory screen is very useful to locate vehicles and save specific criteria important to each customer. Use it to view a list of available vehicles in inventory, and on-order, while having the option of searching for vehicles in a similar price range to a customer's current vehicle.
You have the option of just "Browsing Inventory" where the search is not connected to any specific customer.
Viewing Vehicle Inventory
There are several ways to view the Vehicle Inventory screen as follows:

Click the action button (You will have the option to browse, Add Vehicle Interest or Add Trade for the customer in view; if not viewing a profile then you will be browsing)
From the Profile screen, click the green plus under the Watchlist tab or Saved Searched tab in the vehicle section and this will also open the Vehicle Inventory screen.
From the Profile screen, click the Similar Priced Vehicles link.
From the Traffic Log, click Vehicle Interest/Vehicle Trade icon or pencil.
From the Vehicle Matching tab > Watchlist tab, click the more in stock link next to any stock #.
Note: If the user clicks Similar Priced Vehicles , the Vehicle Locate screen displays with the customer's vehicle information and equity displaying along the header as well as in the column headers of the grid. See image below:
Version 5.6 - Released Oct 1, 2015
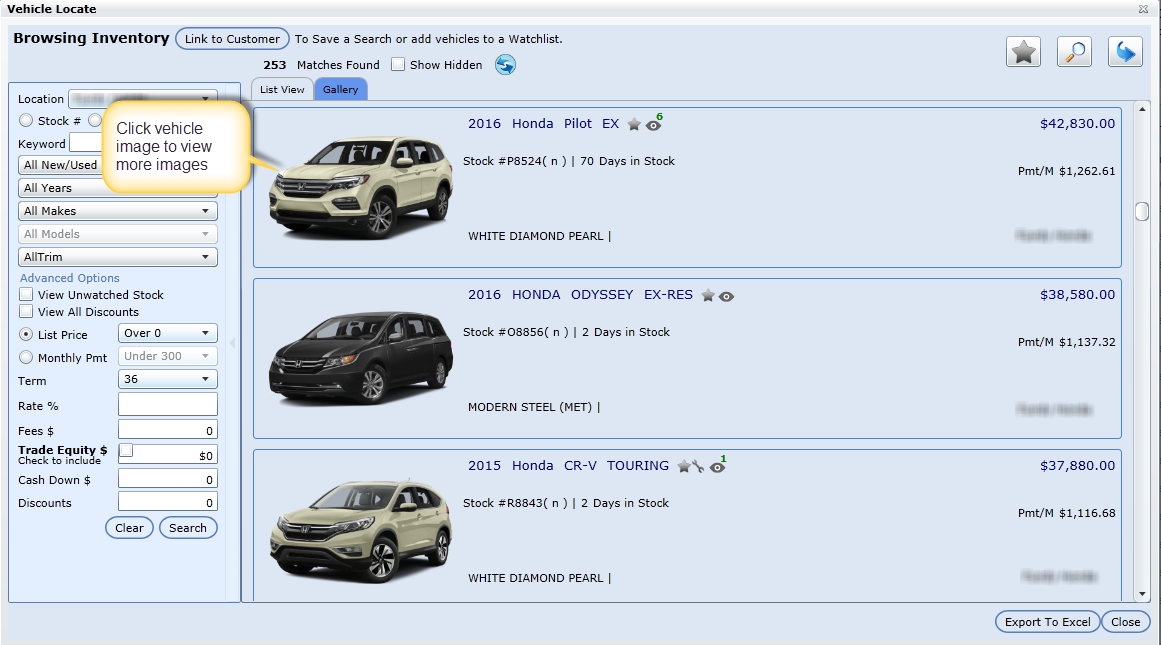
Gallery View
The new Gallery tab will allow you to see the list view in a gallery format, showing an image of the vehicle in its actual color.
Click the vehicle image to view a more extensive image gallery
Year, Make, Model and Trim are made visible
Click the Star to add to Watchlist
The service wrench icon will be visible if there is an open appt or RO
The watcher icon will show a number indicating the number of watchers
Stock #
N, U or other
Days in Stock
List price
Monthly payment (estimate using calculation on left side)
Store Location
List View
Vehicle Inventory Headers - left to right:
Note icon - Managers have an option to enter a temporary note on any vehicle in inventory. Click the note icon to read note.
Service Wrench - will be present on stock #'s that have an open RO in Service.
Star icon - click the icon to add the vehicle to the Watch List. For more on the Watch List, see instructions below.
$ icon - this column will display any incentive added to sell this particular stock #. To view all incentives check the box found on the left hand side of the page labelled "View All Incentives".
Eye icon - number of watchers currently watching this vehicle
NUO - New, Used or Other
Stock # if it is provided to the inventory system
MSRP - Manufacturer's Suggested Retail Price
Pmt/M - based on the filters selected (i.e. Term, Rate, Fees etc.), displays the Monthly Payments
PmtDifference - payment difference of the customer's current monthly payment and the monthly payment of the vehicle in stock
Year
Make
Model
Model Code
Package code
Trim
Color
Description
Vehicle Type
Driveline
Engine
Days in Stock - based on the Received Date
Status - displays the status and status description based on the inventory provided by the DMS
Mileage
Location - location of the inventory
VIN
Version 5.8 - Released Dec 10, 2015
BlackBook Value
Market value - (optional)
Status - DealerMine displays all the Inventory Status in the Admin Screen>Showroom Configuration>Inventory Options, a user now can select what Inventory Statuses they wish to display in the Vehicle Inventory screen, this can be done in Showroom Configuration in the Admin Screen. Once the Inventory Status has been selected in Showroom Configuration the count in the Vehicle Locate screen will adjust to the selections made.
*All Inventory Status will be on by default.
NEW - Version 5.9.4 – Released March 31, 2016
We have enhanced the Inventory in the Vehicle Located screen for the New/USED drop down, which will now show all other values instead of combining them into 'Other'. The Status will display as follows:
D= DEMO classified as NEW inventory but user will still needs to know that it is a DEMO.
T = TCUV (Toyota Certified Used Vehicle) classified as USED but will still show as TCUV.
I = AS IS classified as USED.
S = WHOLESALE classified as USED but will show as WHOLESALE.
Note* If there is no value saved in Showroom Configuration > Inventory Options it will be counted and shown as 'Other' in the Vehicle Located screen.
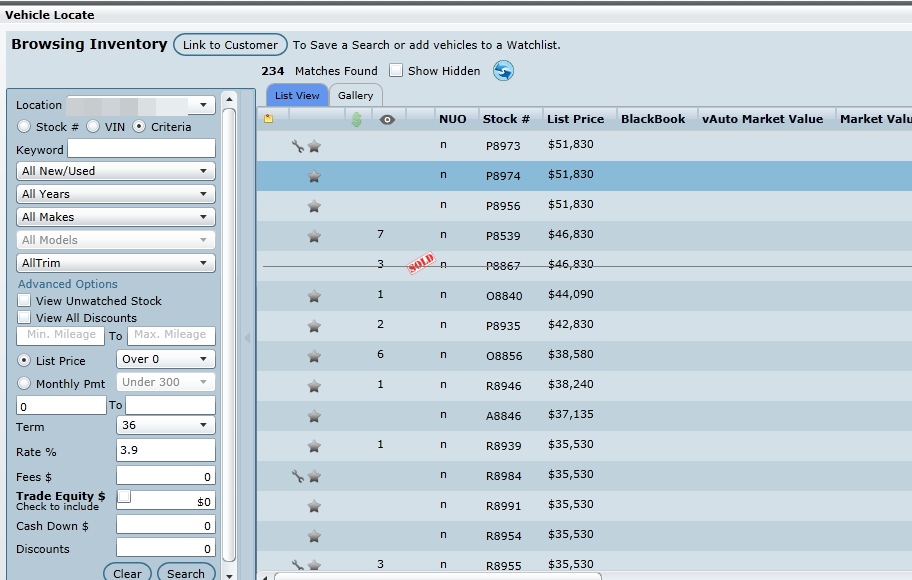
Browsing Inventory
If the user simply clicks the option Browse Inventory, presented is the Vehicle Inventory screen containing a grid which displays all the vehicles listed in the inventory. The user can browse the inventory and then link a specific search to a user (to view how to link a customer, read section Update a Pending Guest of the Pending Guest page).
Location
This drop down contains the Dealership's Inventory as well as any other inventory that they have access to.
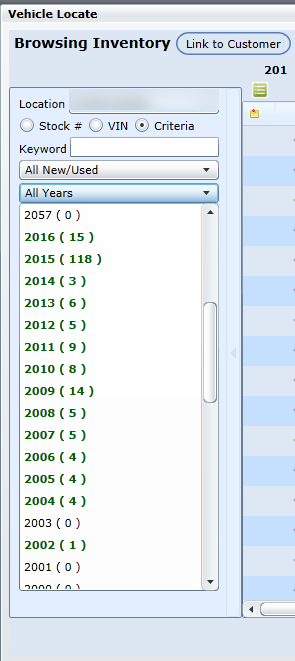
Keyword Search
Using Keyword search the user can search by Year, Make, Model and Trim (if available).

Version 5.9.2 - Released Feb 12, 2016
A user can now search by "Vehicle Type" (Truck, Sub Compact, Passenger Van etc) when in the Vehicle Located screen. DealerMine will pull the Vehicle Type from the VehicleType field in NvinventoryHistory in the inventory screen unless it is blank or null then will use the VehicleType that comes from VinDecoding.
New Columns
There are 4 new columns displaying now in the Vehicle Located screen:
Transmission
Driveline
Package Description
Cylinders
Filters
(Note: using the filters is optional and bolded in green are items returned for the selected filter option)
The user can Filter the returned vehicles by selecting one of the following drop downs:
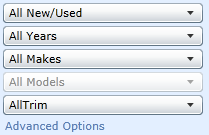
The user can also click on "Advanced Options" to have even more Filter options:
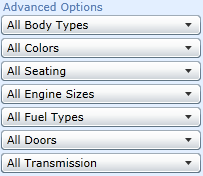
Version 5.6 - Released Oct 15, 2015
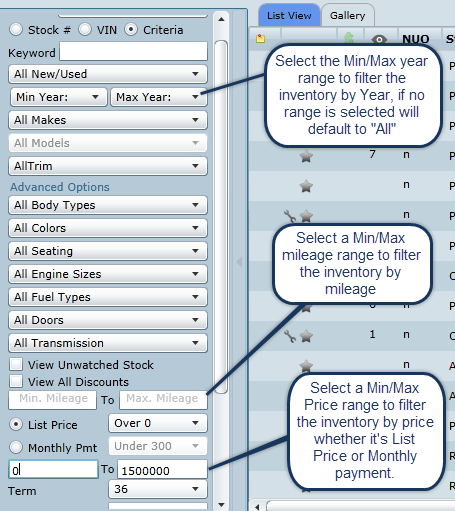
In Advanced Options on the Inventory Screen a user is able to drill down on their searchs by entering Min/Max range for Year, Mileage and Price. When in the Year range if no range is entered will default to "All Years". The Price Min/Max range can be filtered by List Price or Monthly Payment.
Once the user has narrowed the search using the above filters, they can continue to refine their search by using the monthly payment calculator:
Note: If a user doesn't have access to view Black Book, MSRP or Equity, they will not have these options.

Select one of the payment ranges to begin: (Payment ranges, terms and rates are customizable in Administration->Showroom Configuration
List Price is the manufacturer's suggested retail price is displayed under the MSRP column on the grid. Select the drop down to choose a pricing range.
Monthly Payment - From the drop down, select a monthly payment range.
Term - This is the length of time in months that the customer would like to take to pay their car.
Rate - Select the rate that pertains.
Fees - any additional costs on the sale of the car can be added here. This affects the monthly payment and what is returned may change.
Trade Equity - is dollar value of the customer's car. If Trade Equity is checked, it's added to the List Price or Monthly Payment of the cars returned. If the user un-checks this value and clicks refresh, the cars returned in the grid pertain to the Filters selected above: i.e. the Equity isn't included.
If the user checks a vehicle from Add Trade

, the trade vehicle's equity is added to the Trade Equity value and is displayed to the right of the Trade Equity check box (for an example, see image to the left).
Cash Down - Will lower the monthly payment immediately without a refresh.
Dealer Cash - Will lower the monthly payment immediately without a refresh.
If any of the above filters or fields are adjusted, click Refresh Results to update the Matches. The grid refreshes with the matches found, and the Matches Found count will likely change. To clear the above selections, click Clear Selections.

Once the search has been refined to the user's satisfaction, click Add to Saved Searches to continue searching and locating a vehicle match in the Vehicle Matching tab.
Note: Users have the ability to print the Browse Inventory screen. Click Export to Excel, Save and open the file in Excel.
Additional Sub-Screens

Watchlist

Watchlists are lists of selected vehicles that the customer has expressed interest on. When a user clicks a star in the grid next to any vehicle, it saves that selected vehicle in the customer's Watchlist. For Showroom users, the Watchlist is also available on the Customer Profile screen under the Watchlist tab just above the Vehicle Information section.
Vehicle Grid
Displays the following for the returned results:
NUO - New, Used or Other.
Stock #
MSRP: Manufacturer's suggested retail price.
Pmt/M - Monthly payment of the returned vehicle.
PmtDifference - This is the difference of the customer's current monthly from the monthly payment (Pmt/M) of the returned vehicle.
Year/Make/Model/Color/Vehicle Type/Driveline/Engine of the returned vehicle.
Days in Stock - The number of days that the car has been in stock since the received date.
Mileage - of the returned vehicle.
Location - The provider that is being queried.
VIN - Serno of the returned vehicle.

Saved Searches
You have the option of saving any search for a customer if you can or can't locate the vehicle they are searching for.
Click Add to Saved Searches located to the right of the three sub-screen icons, to save search criteria for any customer. The Save popup will appear requiring a name be given to represent this search, followed by clicking OK. The Searches link updates with the number of saved searches and a red orb will appear above this icon indicating how many saved searches exist for this particular customer.
To view the the saved searches, click the Searches button. The Search List popup presents. Edit or Delete any saved search from this window. If Edit is clicked, the Vehicle Locate screen updates in the background with the saved search that was selected. Close the screen and continue to edit the search.
Saved Searches can be viewed from the Customer's file on the Profile screen under the Vehicle Information area. If the customer has saved Searches, an information indicator is displayed on the tab header. Select the tab Searches to view the customer's saved searches.
Saved Searches will be included in the Vehicle Matching tab, where DealerMine is continuously looking for a vehicle match based on the criteria specified in the saved search.
Version 5.8 - Released Dec 10, 2015
Sold Flag
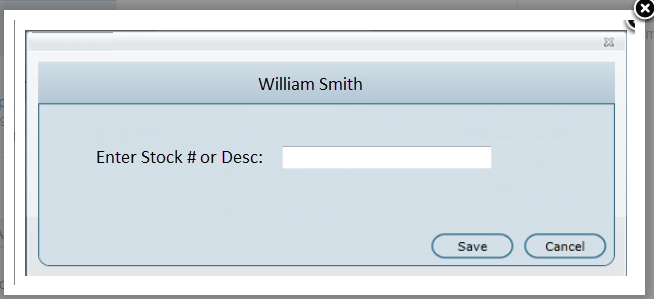
When on the Traffic Log and a vehicle Status is marked as "Sold" a popup screen will display to confirm the stock # of the vehicle sold. Here the user will enter the Stock # of the sold vehicle or they can enter any abbreviation that they would use to identify the sold vehicle.
When a stock # is matched a "Sold" flag will display on the grid in the Vehicle Locate screen along with a strikethrough indicating the vehicle is sold, the vehicle will be disabled so it can't be selected again.
Add Trade

The user can click this button to add trade(s) at any point for a customer.