
The Email tab contains all Mail Folders setup for the logged in user in DealerMine. Each user must be given access to email accounts in order to send/view the incoming and outgoing messages.
All action buttons are displayed in the upper right: i.e. New and Reply. (more options under the reply button)
Click New to create an email to send, cc or bcc to a recipient. Note: bcc records in the email client, but not in the Email Hist tab.
Reply contains a drop down with the following functions:
Reply
Reply All
Forward
Print
Delete
Move To
Mark as Unread
Mark as Read
Refresh
View Profile
The check box column in the email folders allows the user to select more than one email. A user can select several emails at once by checking the box. Clicking the top check box selects all emails loaded into the view. Once the emails have been selected, the user can open the drop down, and press delete. This will delete all checked emails or delete a single email that is selected.
Right click on an email to Mark as Read/Unread, View Customer Profile, or to move the email to another folder.
Right click to Mark as Completed, which will present a green check indicating this email has been looked after. Right click again if uncompleted.
Right click in the Mail Folders menu to create, rename or delete a folder.
When emails are sent from DealerMine to a customer and the email is bounced, the information is captured for referencing.
The user can extract information from any bounced email. From the Email tab, select bounced email from the inbox, and right click. Select View Customer Profile, this action forwards the user to the search screen with the email address and email list populated to find a match in the database. If a match is found or a new customer file is created, the email history is updated showing the email in the Inbox under Email History.
Under the Sent Folder, when a user sends an email, the Username column populates with the user who sent the email. When a reply comes in from a sent email, the Username column populates with the user who originally sent the email.
Users have the ability to Print Emails.
Use the Mark as Complete option if you share an inbox with other users to quickly let everyone see at a glance which emails/customers have been taken care of. We've added a new column to the far right labelled "Completed By" to show the user who marked it as complete.
Note: There's only one way to add an image to an email template by using the URL or the image location on the web.
Version 5.9.1 - Released Jan 14, 2016
Deleting multiple emails - when on the Email tab a user can delete multiple emails at once by placing a check in the Select All check box, a statement will display letting the user know that all emails loaded on that page have been selected "All 00 Emails Loaded are selected" along with the option to select all emails in the inbox "Select all 000 Emails in Inbox" when clicking on this
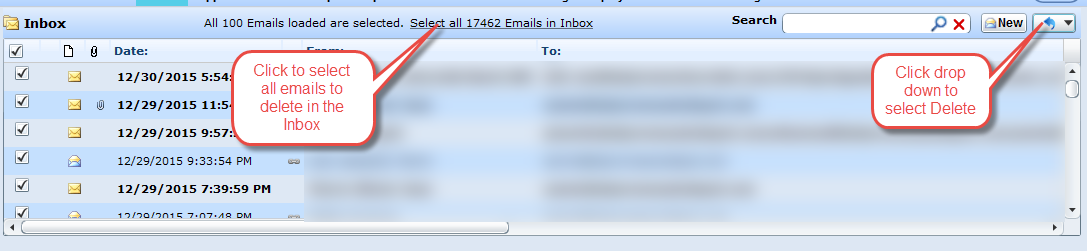
statement it will select all emails in the user's Inbox once this is clicked the user can then go to the drop down and select "Delete" and all emails will be deleted. When clicking on the statement "Select all 000 Emails in Inbox" it will then display "All 000 emails are selected. Clear Selection." If Clear Selection is clicked all emails will be unselected.