
Unsupported embed
From the Profile, click on the Customer Name to view/edit the Customer Information such as name and contact information, merge customers if needed, make changes to how a customer prefers to be contacted overall, or make VIN specific changes.
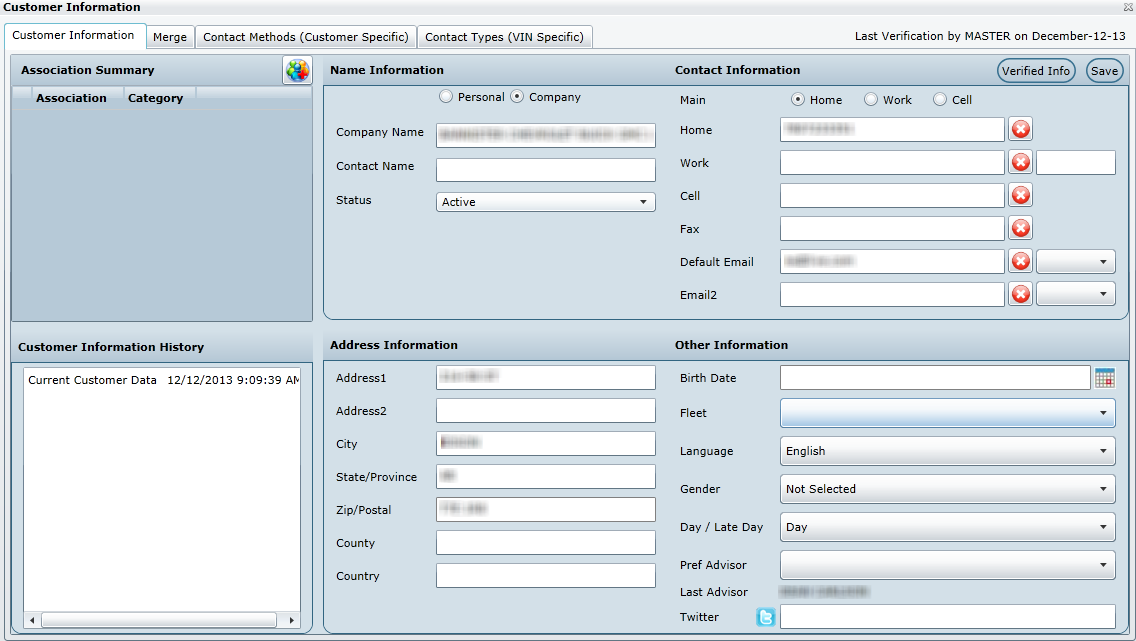
To the left of Save, is the Verified Info button, when this button is clicked, the Last Verification date updates which is displayed above the button Last Verification: months and days. The purpose of updating the verification information is to display the last time the customer's contact information was verified; therefore, the Appointment Coordinator doesn't have to ask the customer to verify their information every time they call (which can be a couple of times a week).
Version 5.9.3 - Released March 4
Now when a user is updating or entering a new address for a customer once they enter the Postal/Zip code and click elsewhere in the Customer Information screen the City, Province/State, County and Country automatically populate for that Postal/Zip code entered. The Postal Code will have the dash replaced with a space for searching.
Note* will not populate any information until the user has clicks out of the Zip/Postal code field.
NEW - Version 6.2 – Released June 23, 2016
Email Option
When adding a new Customer the user now has the option to add an email address or not. There is a Default Email check box in the Customer Info screen when this is checked the user must enter in an email address to Save, if it is not check then an email address is not required to Save.

Customer Information

Associations Summary
Name Information
Contact Information
SAVE
Option to add any associations for each customer. Associations also tie customers together within the Influence Network if customers have similar interests.
Click Save to save all changes before exiting this screen.
Option to edit First Name, Middle Name, Last Name, Contact Name, and Status of the customer file. If the Customer does not require any future contact from DealerMine the customer should be changed to Inactive, selecting the appropriate reason code. I.e. Other dealerships, rental car agencies, deceased customers etc.
Click Save to save all changes before exiting this screen.
Note:
Inactive customers will not qualify for any contact types, meaning they will never be presented on the Call Select screen for any type of contacts.
If there isn't an appropriate Reason Code for the inactivation of a customer, from the administrative screen Turn Off Management, more codes can be added by an administrator
Update Home, Work, Cell, Fax, Email 1, Email 2.
Click the to remove the information permanently in that field. This will send a proper remove request to the DMS to ensure the data will not re-appear the next business day.
Click Save to save all changes before exiting this screen.

Customer Information History
Address Information
Other Information
A running list of changes saved in the customer information screen will be saved and listed here in order of most recent on top.
Update any of the following fields: Address1, Address2, City, State/Province, Zip/Postal, County and Country.
Click Save to save all changes before exiting this screen.
Update any of the following fields: Birth Date, Fleet, Language, Gender, Day/Night, Pref Advisor and Twitter account.
Click Save to save all changes before exiting this screen.
Note: Fleet, Language, Day/Night are all selections on the Call Select Screen dependent upon information entered in this screen.